Avalanchio REST API
This document exaplains how you can use avalanchio REST api services. But, first, you need to generate a JWOT token, which is required by the REST api service.
Create Rest API token
Follow the following steps to create token
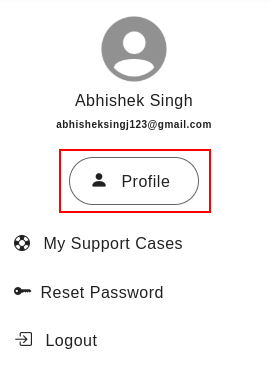
Access Profile:
Navigate to your user profile. This is typically located in the top right corner of the application's interface.

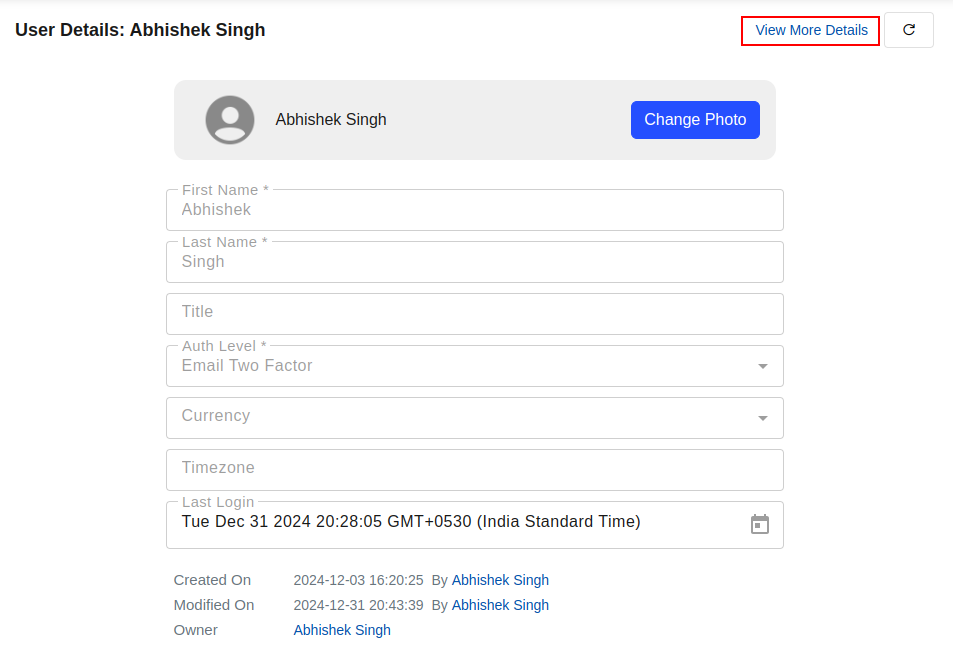
Access your detailed profile information.
Click on "View More Details" button in top right corner. Clicking this will often expand the profile information and reveal additional options.
Create a New Token:
Select the "API Token" tab within your profile details. Click the "Create New Token" button.
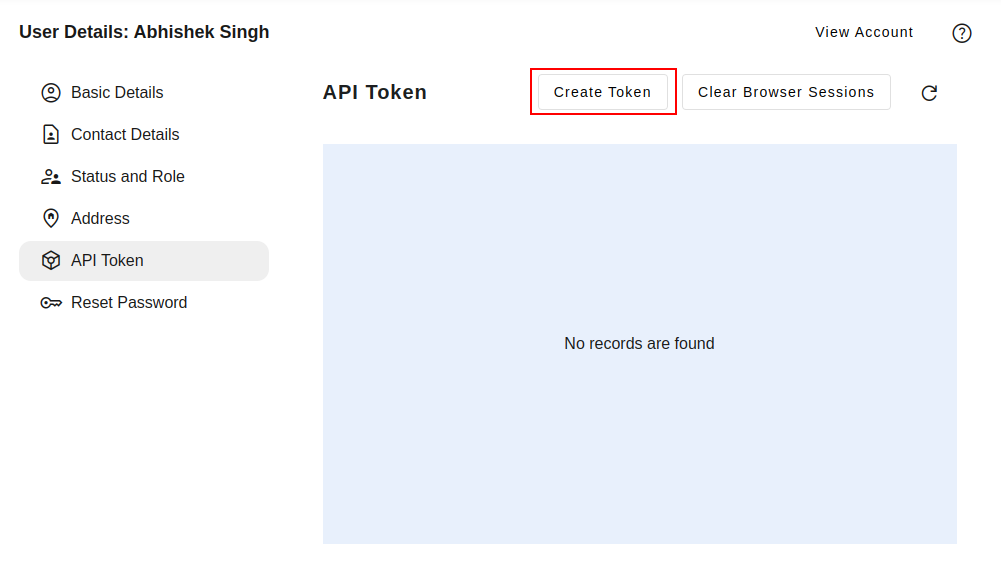
Token Name: Assign a descriptive name to the token (e.g., "Integration with X", "Mobile App Access").
Expiry: Review and adjust the token's expiration time as needed, adhering to security best practices. For example, one year from current date.

Token Generation and Retrieval:
Upon successful token creation, a success message will be displayed, including the newly generated token. Immediately copy the entire token string for future use, as it will not be displayed again.

Note: Treat API tokens with the utmost care as they provide access to your account. Avoid sharing them with anyone and revoke them when no longer required.
Create credentials configuration file
Usually, the token is saved on system from which you want to invoke the API calls. Create a file $HOME/aio/avalanchio.ini. Below is the file template. Replace the base URL and token as appropriate for your use case.
[DEFAULT]
base_url=https://apps.avalanchio.com
authorization=<enter your authorization token created above.
                Exclude the angular bracket.😊>
Python Code Examples
Below examples are using python programming language. While making the request, the examples use requests library of python. Any python versions 3.8+ should be fine to follow along the examples. Before you try the example, you need Avalanchio account. Once you have an account, you need the endpoint and and generate a token.
Install requests library if you already do not have.
Set the token and base_url with token and base url respectively. These two variables are used throughout the examples. For convenience, we created a simple headers dictionary which contains the required HTTP HEADERS to make the REST API calls.
import requests

token='<replace with your own token>'
base_url='<replace with the endpoint you received while creating the token>'

headers = {
    'Accept': 'application/json',
    'Authorization': f'Bearer {token}'
}
Common HTTP Response Status Code
| Status Code | Description |
|---|---|
| 400 | Bad request. Server failed to process your request |
| 401 | Unauthorized. If you try to invoke a request to an endpoint which required authentication, server sends this status code. |
| 403 | Invalid or expired authorization token |
| 404 | The endpoint you are requesting does not exist. |
| 5xx | Internal server error while processing your request |
Below is a utility function to load the token and base URL either from a environment variable or default configuration which is expected at ~/aio/avalanchio.ini.
import os
import pathlib
import configparser

def connection_info(profile = None):
    """
    Retrieve authentication token and base URL
    from environment variables or config file

    Args:
        profile (str, optional): Configuration profile name to use.
        Defaults to None.

    Returns:
        tuple: (token, base_url) - Authentication token and base
                URL for API connection
    """
    # First try to get credentials from environment variables
    token_ = os.getenv("AIO_TOKEN")
    base_url_ = os.getenv("AIO_BASE_URL")

    # Define path to configuration file in user's home directory
    ini_file = os.path.join(pathlib.Path.home(), "aio", "avalanchio.ini")

    # If config file exists, try to load credentials from it
    if os.path.exists(ini_file):
        # Initialize config parser
        config = configparser.ConfigParser()
        config.read(ini_file)

        # Get either default section or specified profile section
        section = config.defaults() if profile is None else config[profile]

        # If token not found in environment, try to get from config
        if token_ is None and "authorization" in section:
            token_ = section["authorization"]

        # If base URL not found in environment, try to get from config
        if base_url_ is None and "base_url" in section:
            base_url_ = section["base_url"]

    return token_, base_url_

token, base_url = connection_info()
Test API by find the current user info
Find the details of the user related to the token value. In the response you can see the name, email, address etc. fields.
List Existing Tables
List the existing tables.
Create/modify Table
Create table with columns. The operation is idempotent, i.e. if you run this operation multiple times, it does not cause any side effect. If you add new columns in the request or changes properties of the columns, the changes are applied. If you exclude any column in the request of an existing table, the excluded columns are not dropped.
payload = {
        "name": 'my_user',
        "columns": [
            {"name": "age", "type": "Integer"},
            {"name": "gender", "type": "Picklist"
                    , "picklist_items": ["Male", "Female", "Other"]},
        ]
    }

res = requests.post(f'{base_url}/api/v1/schema/tables'
            , headers = headers, json = payload)
res.json()
Table Properties
| Field | Description |
|---|---|
| name | API name of the table. Name cannot change of an existing table. Table name is unique. |
| label | User friendly name of the table. |
| allow_create | Allow create record using UI control. |
| allow_delete | Allow delete record using UI control. |
| enable_field_audit | Allow field history tracking. |
| skip_audit_fields | Skip the system fields of the table. |
| enable_search | Allow users to query the table using query builder. |
| time_column | Time column of the table. It must be a indexed column of Date or Timestamp type. |
| columns | List of the columns in the request. |
Column Properties
| Field | Description |
|---|---|
| name | API name of the column. Column name is unique for a given table. Name cannot be changed of an existing column. |
| label | User friendly name of the column |
| type | Type of the column. |
| length | Fixed length of the field. It is applicable for the Embedding column type. |
| max_length | Maximum length of the field value. It is applicable for string type columns. |
| help | Help text for the column. |
| editable | It controls whether the field is editable using UI table record. |
| required | Makes the column required while saving a record. |
| searchable | Makes the column searchable in the query builder screen. |
| indexed | It turns on secondary index on the column. |
| unique | It makes the column unique. |
| description | Description of the column. It is displayed on the UI in the record detail page. |
| picklist_items | List of the picklist choice values. It is applicable for Picklist column type. |
Describe Table
Describe the table by its name. It shows the table properties and list of columns.
res = requests.get(f'{base_url}/api/v1/schema/describe-table/my_user'
                    , headers = headers)
res.json()
Insert Record
Insert record to a table. In each request, you can include multiple records as you see the records property is the list type. You can include up to 10,000 records per batch, however, other restriction may be triggered such size of the request prior reaching this limit.
You can add id for each record, but it must be Bigint data type. If you do not provide the value for the id field, the system auto-generates a value for id.
payload = {
    "records": [
                    {
                        "name": "Test user",
                        "age": 40,
                        "gender": "Other"
                    }
                ]

}

res = requests.post(f'{base_url}/api/v1/tables/my_user'
                , headers = headers, json = payload)
res.json()
Add/modify a column to the table
Adding a new column to the table. You can include multiple columns in the same request. The request is idempotent. Using the same request you can make changes to the existing column propeties.
payload = {

    "columns": [
                    {
                        "name": "email",
                        "type": "Email"
                    }
                ]

}


res = requests.post(f'{base_url}/api/v1/schema/tables/my_user/columns'
                , headers = headers, json = payload)
res.json()
Add a unique indexed column
Make the column indexed and unique.
payload = {
    "columns": [
                    {
                        "name": "email",
                        "type": "Email",
                        "indexed": True,
                        "unique": True
                    }
                ]
}

res = requests.post(f'{base_url}/api/v1/schema/tables/my_user/columns'
                    , headers = headers, json = payload)
res.json()
Insert Record By Upsert Key
Save a record using upsert key. The upsert_key must be indexed and unique. System will try to find an existing record using upsert_key value in case id value is missing in the request. If you include the id value and upsert_key, that takes the precedence.
payload = {
    "records": [
                    {
                        "name": "John Doe",
                        "age": 50,
                        "gender": "Male",
                        "email": "john@mycompany.com"
                    }
                ],
    "upsert_key": "email"

}

res = requests.post(f'{base_url}/api/v1/tables/my_user'
                , headers = headers, json = payload)
res.json()
Delete Record By Id
Delete a record by id.
res = requests.delete(f'{base_url}/api/v1/tables/my_user/1237373688'
                , headers = headers, json = payload)
res.json()
SQL Query Table Using SQL
Execute a sql query on a table. You can also include multiple tables using a join query.
payload = {
    "statement":"select * from my_user limit 10"
}
res = requests.post(f'{base_url}/api/v1/query'
                , headers = headers, json = payload)
res.json()
Delete Records By Query
Delete records by a SQL where clause.
params = {"q": "email = 'john@mycompany.com'"}
res = requests.delete(f'{base_url}/api/v1/tables/my_user/delete-by-query'
                , headers = headers, params = params)
res.json()
Drop Table
Drop a table.
res = requests.delete(f'{base_url}/api/v1/schema/drop-table/my_user'
                , headers = headers, params = params)
res.json()
Bulk Load Data Drom Multiple Csv Files
In this example, we will see how we create a stock table and load 5885 files in the table.
You can download the dataset from Kaggle
In the first step, we create a table - stock. Note that symbol field is not in the first, but we can capture the symbol from the file name. We turn off the audit fields since they are not required for this table. We also turn on secondary index on the symbol field for faster retrieval by symbol.
Note: to the run the code below, you still need to import requests library and set base_url and headers as described earlier in this document.
payload = {
        "name": 'stock',
        "skip_audit_fields": True,
        "columns": [
            {"name": "date", "type": "Date"},
            {"name": "open", "type": "Double"},
            {"name": "high", "type": "Double"},
            {"name": "low", "type": "Double"},
            {"name": "close", "type": "Double"},
            {"name": "adj_close", "type": "Double"},
            {"name": "volume", "type": "Integer"},
            {"name": "symbol", "type": "Text", "indexed": True},
        ]
    }

res = requests.post(f'{base_url}/api/v1/schema/tables'
            , headers = headers, json = payload)
print(res.json())
In the second step, we read all csv files (each file corresponds to a single stock symbol e.g. GE). We are inserting 10,000 records per batch. In this code, only csv module is required. We are loading the file incrementatlly, which preserves memory usage by loading python process. Same process can be used to load large files as well.
# Import required libraries
import csv
import requests

# Set the directory path containing stock market CSV files
directory = '/data/stock-market-dataset/stocks'

# Define batch size for bulk processing
batch_size = 10000

# Initialize counter for total records processed
total_count = 0

# Define mapping between CSV field names and desired database column names
field_mapping = {
    'Date': 'date',
    'Open': 'open',
    'High': 'high',
    'Low': 'low',
    'Close': 'close',
    'Adj Close': 'adj_close',
    'Volume': 'volume',
    'symbol': 'symbol'
}

def map_fields(rec: dict):
    """
    Transform input record fields according to field_mapping
    and handle data type conversions

    Args:
        rec (dict): Input record with original field names

    Returns:
        dict: Transformed record with mapped field names and converted values
    """
    output = dict()
    for k, v in rec.items():
        # Map the field name using field_mapping, keep
        # original if no mapping exists
        k = field_mapping.get(k, k)

        # Convert empty values to None
        if not v:
            v = None

        # Convert volume to integer if present
        if k == 'volume':
            if v:
                # First convert to float to handle scientific notation
                v = float(v)
                # Then convert to integer
                v = int(v)
        output[k] = v
    return output

def insert_records(batch: list, table_name: str):
    """
    Insert a batch of records into the specified database table

    Args:
        batch (list): List of records to insert
        table_name (str): Name of the target database table
    """
    if batch:
        # Transform all records in the batch
        batch = [map_fields(r) for r in batch]

        # Prepare payload for API request
        payload = {'records': batch}

        # Send POST request to API endpoint
        res = requests.post(f'{base_url}/api/v1/tables/{table_name}'
                    , headers=headers, json=payload)
        assert res.ok, f'Error: {res.text}'

        # Update total count of processed records
        global total_count
        total_count += len(batch)

# Main processing loop - iterate through all CSV files in the directory
for name in sorted(os.listdir(directory)):
    # Extract symbol from filename by removing .csv extension
    symbol = name.replace(".csv", "")

    # Display progress update (using carriage return for inline updates)
    print(f"Loading, total count: {total_count}, symbol: {symbol}    "
                , end="\r")

    # Open and process each CSV file
    with open(os.path.join(directory, name)) as f:
        batch = []
        # Read CSV file line by line
        for r in csv.DictReader(f):
            # Add symbol to each record
            r['symbol'] = symbol
            batch.append(r)

            # When batch size is reached, insert records and clear batch
            if len(batch) == batch_size:
                insert_records(batch, 'stock')
                batch.clear()

# Insert any remaining records in the final batch
insert_records(batch, 'stock')